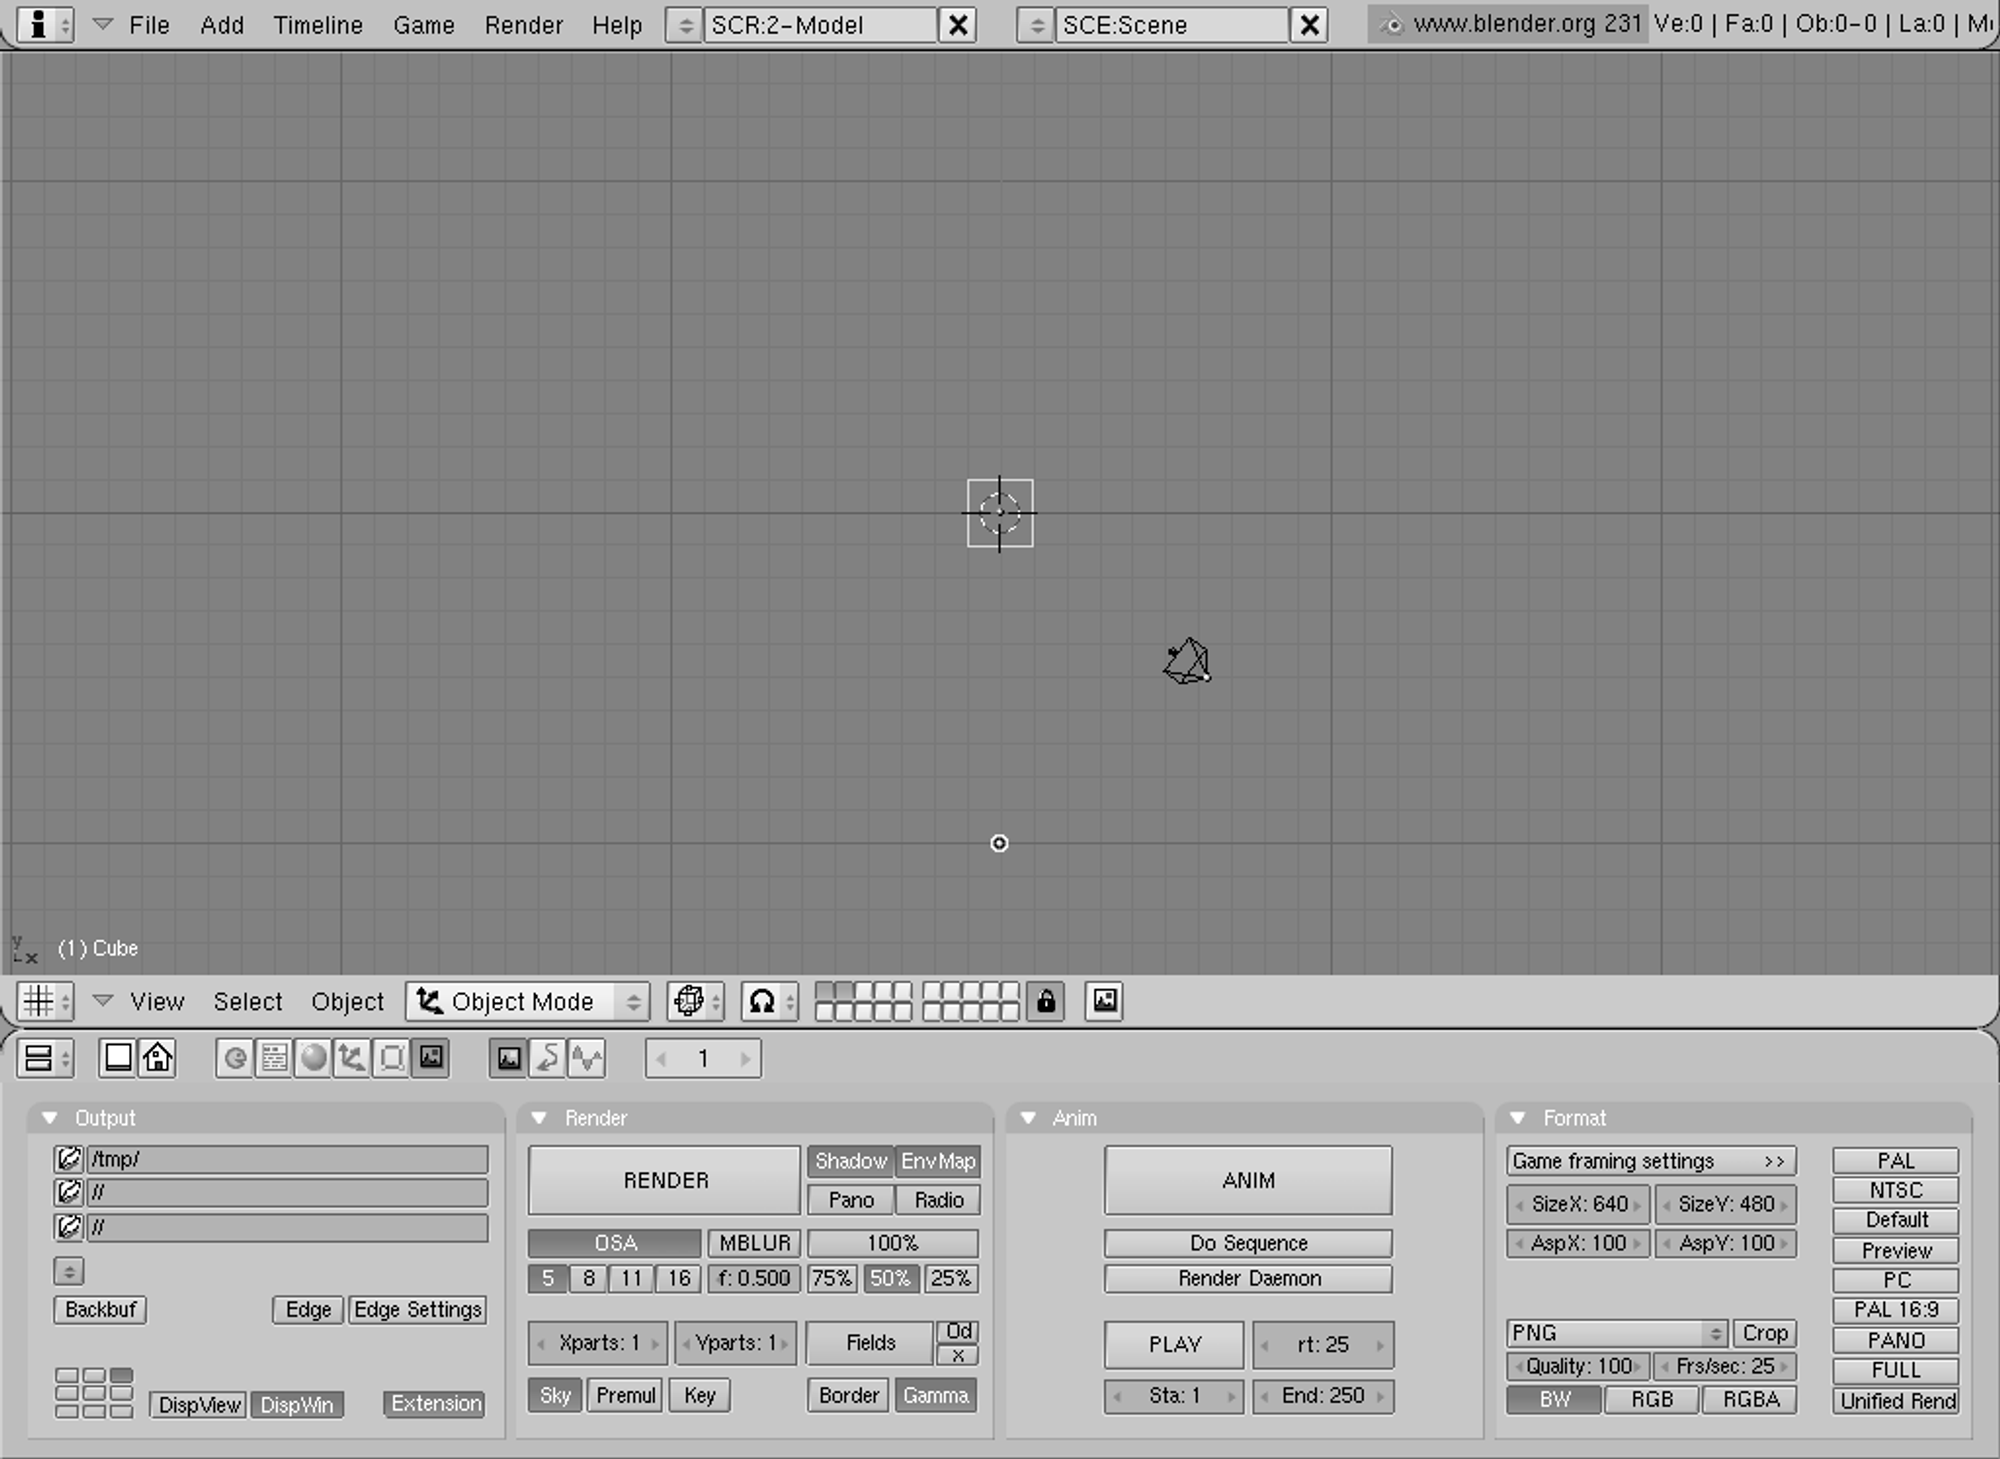
Many, many, many years ago, I stumbled across Blender and picked it up as a hobby. I was able to climb the learning curve slowly but with every new iteration, I felt like I was knocked back a bit and had to re-learn workflows, UI, and tools. For example, Blender looked a little something like this when I started:

The interface wasn’t great. I am grateful it has improved a LOT in the years that I have been using it. Once again, a major Blender version has been released and has left me researching and learning new tools and interfaces. Fortunately, Blender is far more reliable, stable, and consistent from long long ago when I started. Version 4.0 has brought some huge changes to the Blender environment. Here are the five features that I am most excited about.
1. “Snap Base” Modeling Feature
I have always loved modeling in Blender, but one of my biggest pain points has always been snapping objects to other objects. Sure there is the “Snapping” tool at the top of the 3D Viewport, and that works great in Edit mode, but Object mode relies entirely on the object’s origin. Resetting the object origin isn’t difficult, but it can feel tedious and time-consuming.
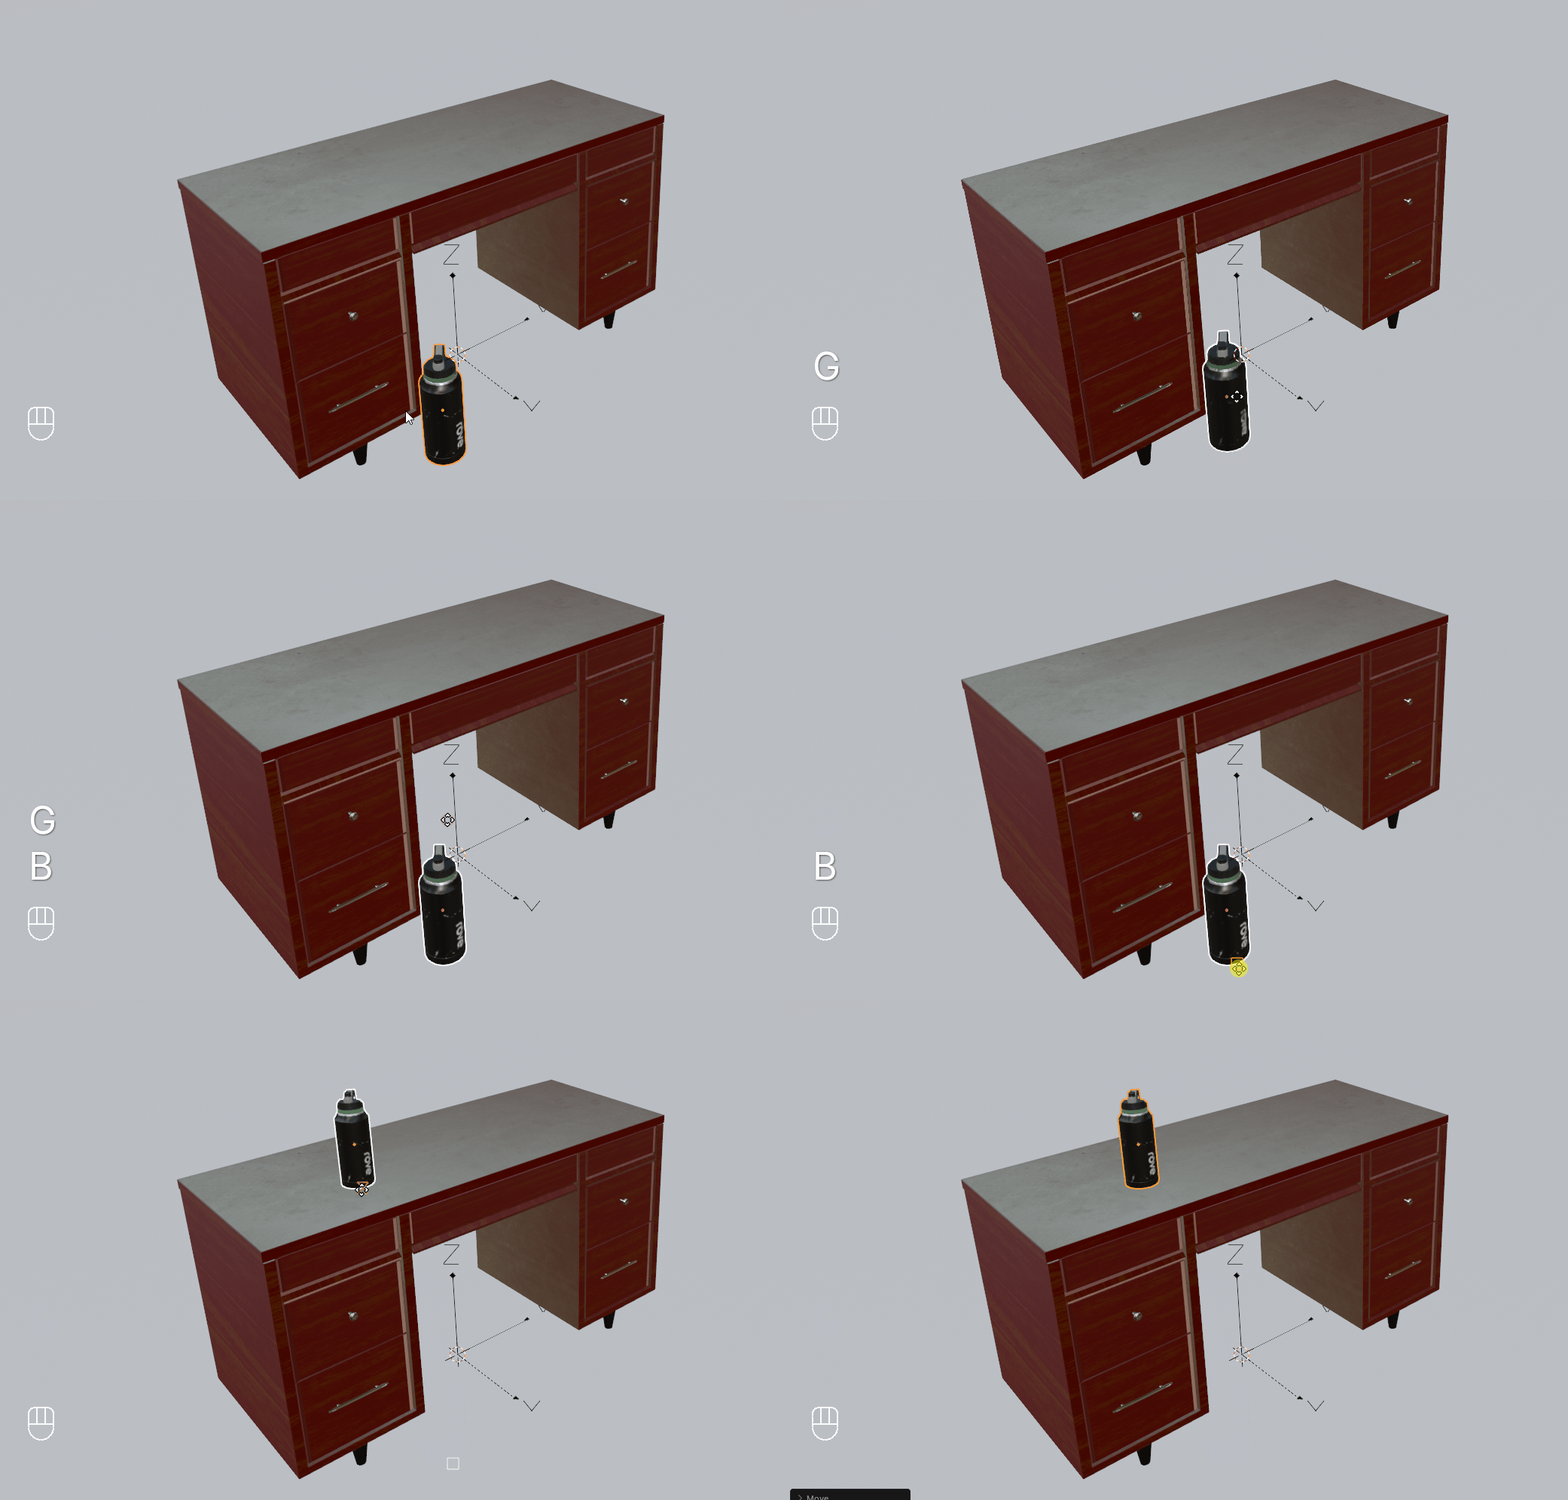
This is where the new Snap Base feature comes in. Snap Base allows you to adjust the object snap and pivot points on the fly while manipulating an object. Object snap points can be set to either vertices, faces, or edge midpoints.
Using Snap Base
- In Object Mode, left-click to select the object you want to move.
- Press G to grab the object and start to move it.
- Press B to activate the Snap Base tool.
- As you hover over different parts of your object, you will now see an orange square (vertex), triangle (edge), or circle (face) icon on your cursor. This is the point on your object that you want to use as the snapping point.
- Left-click on the desired point. Now you should be able to snap that object to any other object’s vertex, edge, or face based on your desired snapping point.

2. Creating Custom Tools and Modifiers with Geometry Nodes
Geometry Nodes were a powerful addition to Blender that opened up a new world of possibilities for 3D artists. The difficulty comes with sharing and replicating Geometry Node trees. Up until now, you were either forced to append the node tree from another file and tinker with it to get it working in your current scene, or simply rebuild it. This is been streamlined in Blender 4.0. Geometry Node trees can now be saved as Custom Modifiers or Custom Tools for quick use.
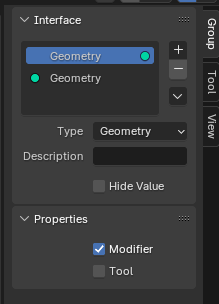
When in the Geometry Nodes tab, in the Geometry Nodes Editor, press N to toggle the side tool bar. In the “Group” tab, you should now see two checkboxes under “Properties” – one for Modifier and one for Tool. This is where you can select where you want your node tree to appear.

Along with this new addition, Blender 4.0 has also restructured the Modifiers tab. By default, the “Add Modifiers” button gives you a much more simplified dropdown as well as a search bar and a tab to add Geometry Nodes. Simply create a node tree and set it to “Modifiers” to then easily add this node setup to any object by way of a Modifier.
3. Light and Shadow Linking
Blender is a very powerful 3D tool with a robust set of lights for every need. These lights all work great, but a light affects every part of the scene that it touches. For those of us who might want to add a little more artistic control to our scenes, Blender 4.0 brings us Light and Shadow linking.
A quick note – this feature only works with the Cycles render engine.
Light linking is applied to a light and allows you to specify the objects that will receive that light while excluding others. Similarly, Shadow linking is the same but for shadows. Shadow linking allows you to specify which object will cast a shadow (or not cast a shadow) from a given light.
- When you select a light, go to the Object Properties tab
 and open up the “Shading” dropdown.
 - Click “New”
- In the dark grey window, click and drag the desired object from the Scene Outline.
- This object will now be the only object receiving light from the selected light. Click the checkbox next to the object’s name to exclude that object from receiving the light (all others WILL receive light.)
Follow the same steps with the Shadow Linking tab.
4. Kuwahara Filter
Blender has been a one-stop-shop in many regards for years. Despite all its features, Blender always required extra effort to create scenes with a painterly effect. Blender 4.0 brings us the new Kuwahara filter to the Blender Compositor. Quickly give any scene a painted, brush stroke effect.
To add, simply go to the Compositing tab, press Ctrl+A to add a node, then add it to your node tree. Dial in the settings to get the desired effect.
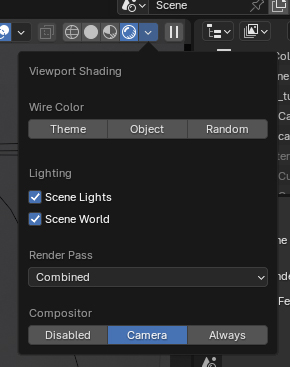
Bonus tip: You can see your composite output in real-time in the 3D viewport! Simply turn on Render shading mode, and click the dropdown arrow next to it. At the bottom of the dropdown, you will see a “Compositor” option. You can turn on “Camera” to see your scene render update in real-time with the compositor nodes included.

5. Incremental Save
I have lost count of how many times I have been working on a project, and have wanted to experiment with something unique, only to realize that my plan wasn’t going to work out – and Ctrl+Z only goes back so far. Blender 4.0 solves this by adding a “Save Incremental” option to the File dropdown. Now, Blender will automatically save a numbered version of your file automatically. Simply hit Ctrl+Alt+S to save a version of your file. This seems like such a simple and forgettable addition to 4.0, but I know I will be using it all the time. At the end of every Blender project, I wish I had an easy way to incrementally save files so I could go back and modify them at a particular point in the process – or just render out a timelapse of each step of the project.
In Conclusion
This is just a quick pass through some of the features that I have been using the most with the new version of Blender 4.0. This is only scratching the surface though. This article doesn’t even touch on all of the new animation features and the new Principled BSDF node setup. There are so many new features and so much to explore with this release of Blender. This powerful software has gotten even more powerful and user-friendly.
Each new feature is worthy of its own tutorial. Stay in the loop with all the newest tutorials by signing up for our newsletter below.

