Updated for Blender Version: 3.1
Get to the Point
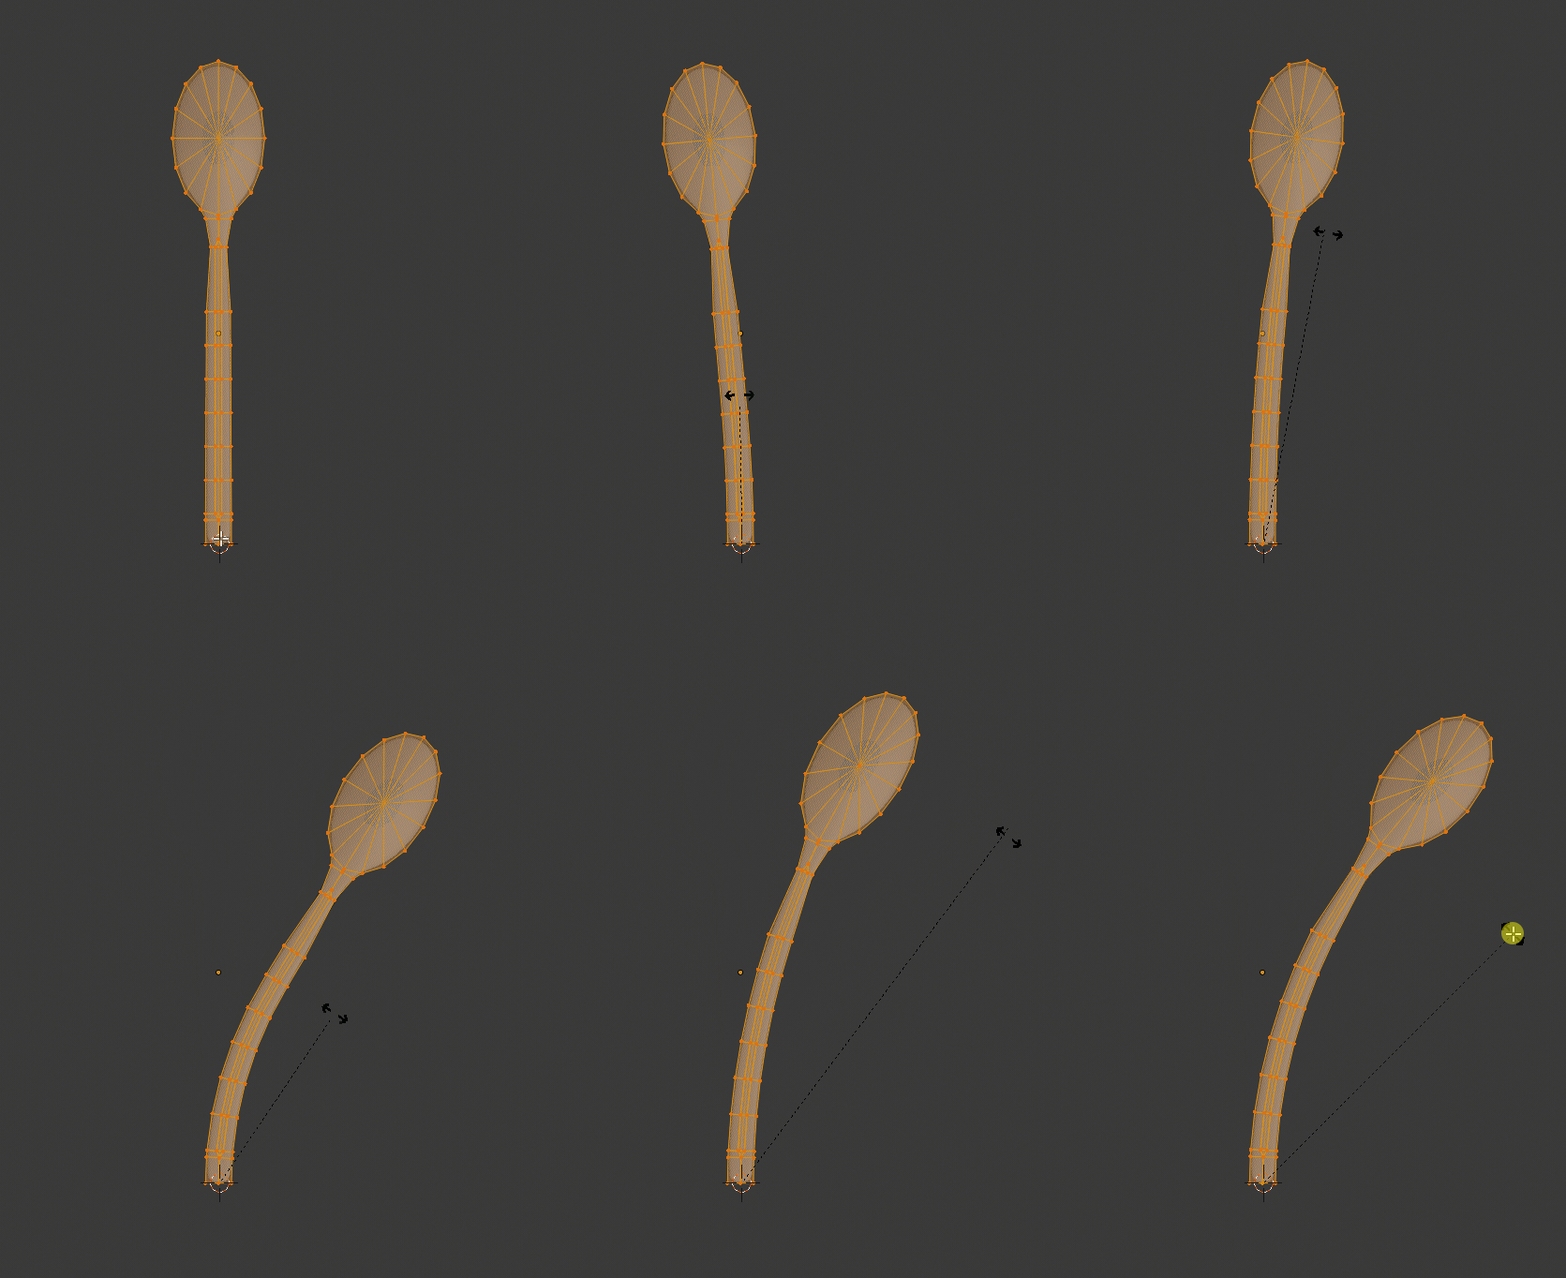
- Select the object you want to bend and enter edit mode.
- Make sure there enough loop cuts along the object (ctrl+R).
- Press 1 or 3 on the NUM pad to view front or side view of your object.
- Select the part of your object that you want to bend.
- Use Shift+Right-Click to place the 3D cursor at the pivot point.
- Press Shift+W to bend. Pull and move the mouse to affect the bend.
NOTE: This seems to work best when your mouse cursor starts at the same point as the 3D cursor when Shift+W is pressed.
It can be difficult to take an existing object and bend it to shape things like pipes or sink faucets. There are multiple ways to bend an object in Blender, such as the Lattice Modifier, but sometimes a quick keyboard shortcut is the fastest approach. Start by selecting the object you want to bend and enter Edit Mode by pressing the TAB key. Be sure there are enough edge loops up the length of the object to ensure that it will bend smoothly. More edge loops mean a cleaner, smoother bend. Change the view to the front or side by pressing 1 or 3 respectively on the NUM pad. This profile view will help make the bending process easier. Next, select the vertices that you wish to bend. Use Shift+Right-Click to move the 3D cursor to where the pivot point of the bend will be, then press Shift+W to activate the bend tool. Pull the mouse away from or around the 3D cursor to manipulate the selected vertices. It can take some experimentation to get the correct position of the 3D cursor and the appropriate direction in which to pull the mouse. Some trial-and-error is necessary to nail down where the pivot point (3D cursor) should go. The mouse manipulation seems to work best when the mouse cursor starts at the position of the 3D cursor when the bend is activated with Shift+W. When you are satisfied with the bend, left-click to confirm the change.


