Updated for Blender Version: 3.1
Get to the Point
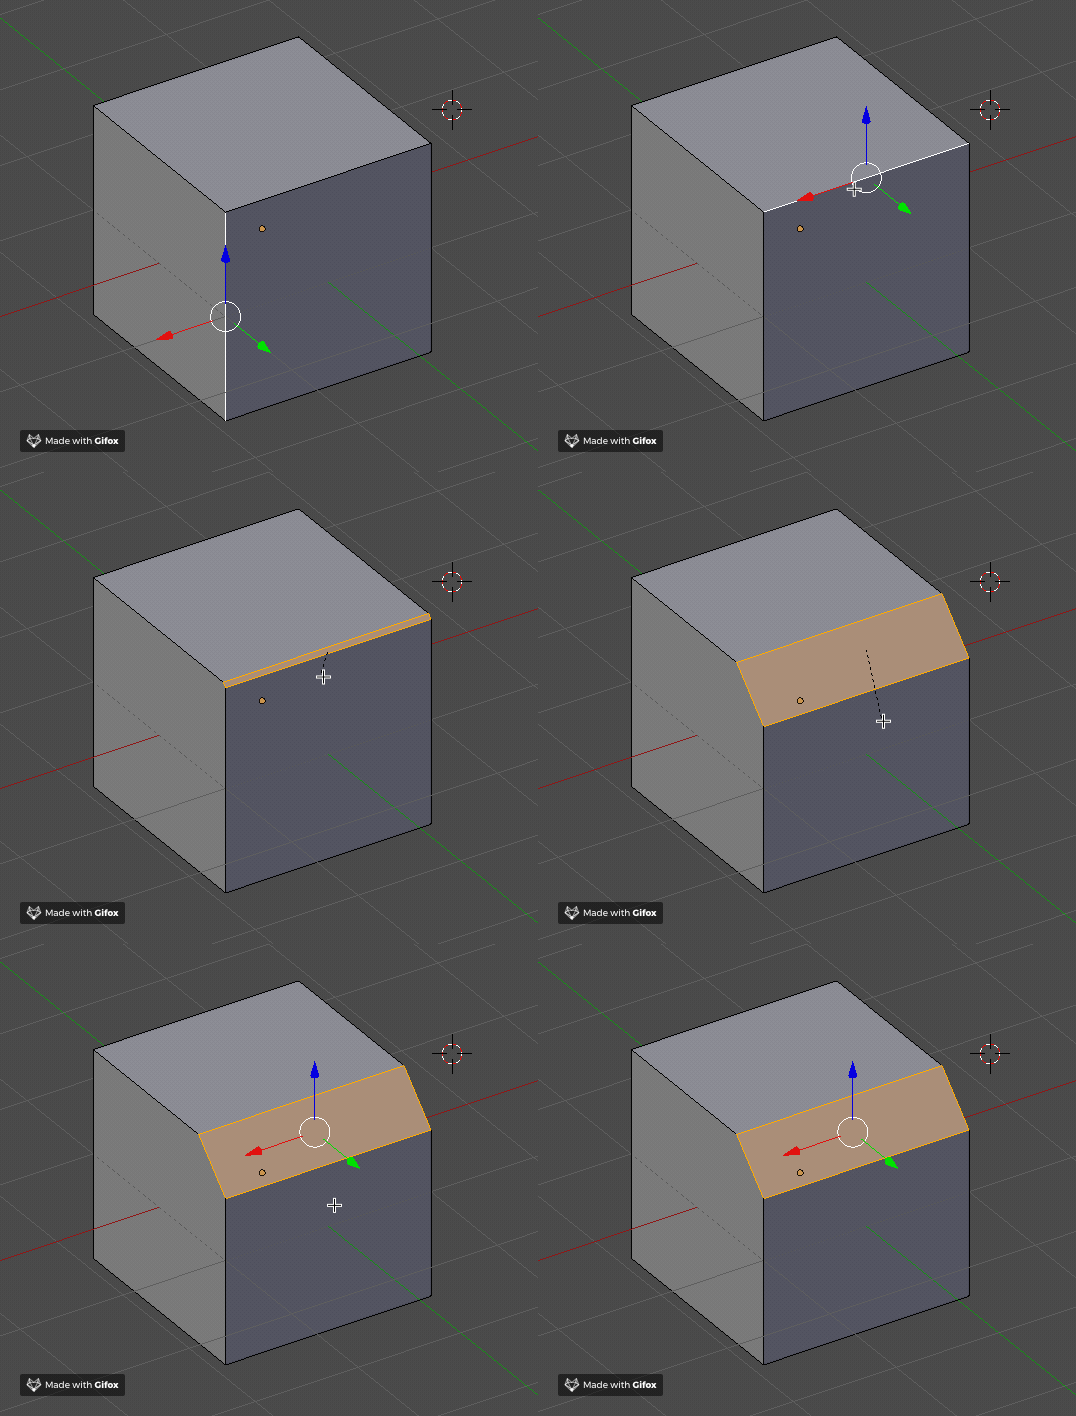
- Select the object and enter Edit Mode by pressing Tab
- Enter Edge Select mode by clicking the Edge selector button in the top left
 , or pressing the 2 key
 - Shift+Left-Click the edges to bevel
- Press Ctrl+B to activate bevel tool
- Slide the mouse left or right to increase the Bevel weight
- Left-click to place the Bevel
The Bevel tool is a great way to add extra detail to the edges of a model – especially hard surface models. In the real world, there are virtually no perfectly hard edges. Even a sheet of paper has some thickness to it, even if it is microscopic. Using the Bevel tool to add even slight bevels to the edges of your models can be just enough for the edges to catch some extra light and add just a touch more realism to the scene.
Start out by selecting the object and entering Edit Mode. Using Edge Select Mode ![]() , select the edges to bevel with Shift+Right-Click. Then press Ctrl+B to activate the Bevel tool. Slide the mouse right and left to see the bevel weight of the selected edges increase or decrease. At this point, you can use the scroll wheel as well to increase or decrease the number of segments in the bevel, easily turning a flat bevel face into a nicely rounded edge. When the bevel looks good, left-click to confirm the change.
, select the edges to bevel with Shift+Right-Click. Then press Ctrl+B to activate the Bevel tool. Slide the mouse right and left to see the bevel weight of the selected edges increase or decrease. At this point, you can use the scroll wheel as well to increase or decrease the number of segments in the bevel, easily turning a flat bevel face into a nicely rounded edge. When the bevel looks good, left-click to confirm the change.

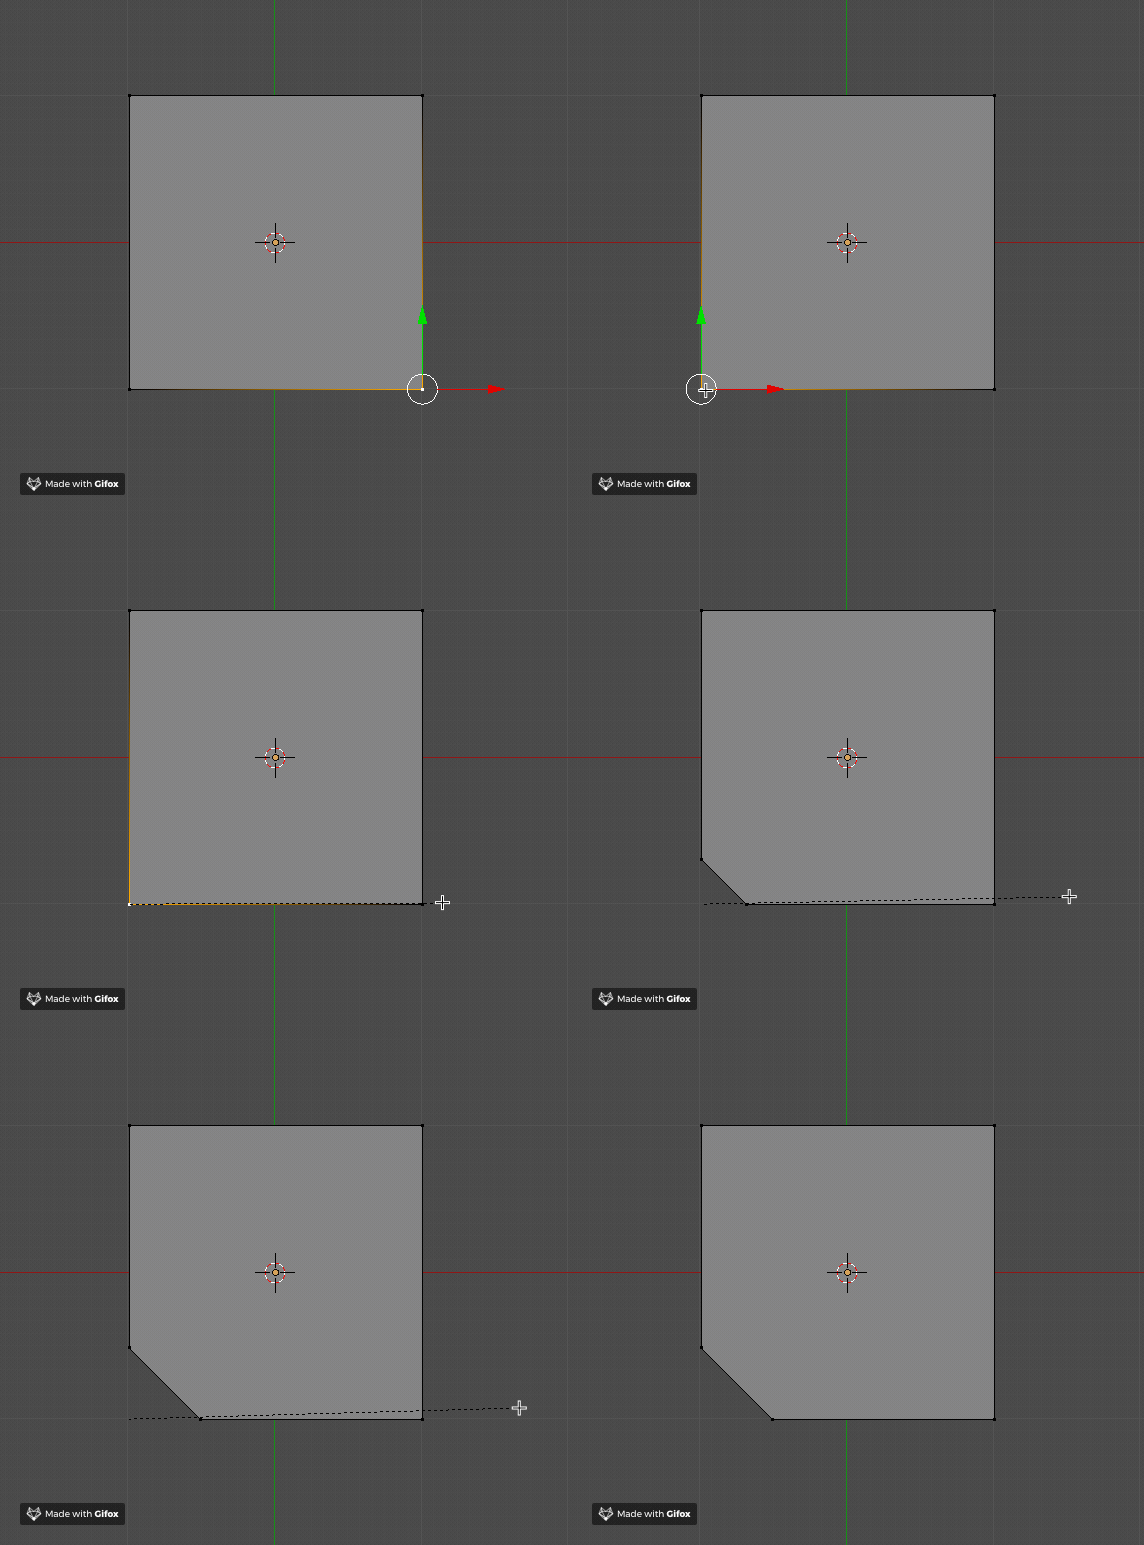
Bevels can also be added to single vertices as well, using a similar process. Rather than selecting an edge, use the Vertex Select mode ![]() to select a single vertex. Press Ctrl+Shift+B to use the Vertex Bevel tool. Slide the mouse right and left to find the bevel weight you want (using the mouse wheel to add or remove segments as needed) then left-click to accept.
to select a single vertex. Press Ctrl+Shift+B to use the Vertex Bevel tool. Slide the mouse right and left to find the bevel weight you want (using the mouse wheel to add or remove segments as needed) then left-click to accept.

Note: When sliding out to adjust the bevel weight, try holding the Shift key to slow down the adjustment for a more precise bevel.

