
Updated for Blender Version: 3.1
Get to the Point
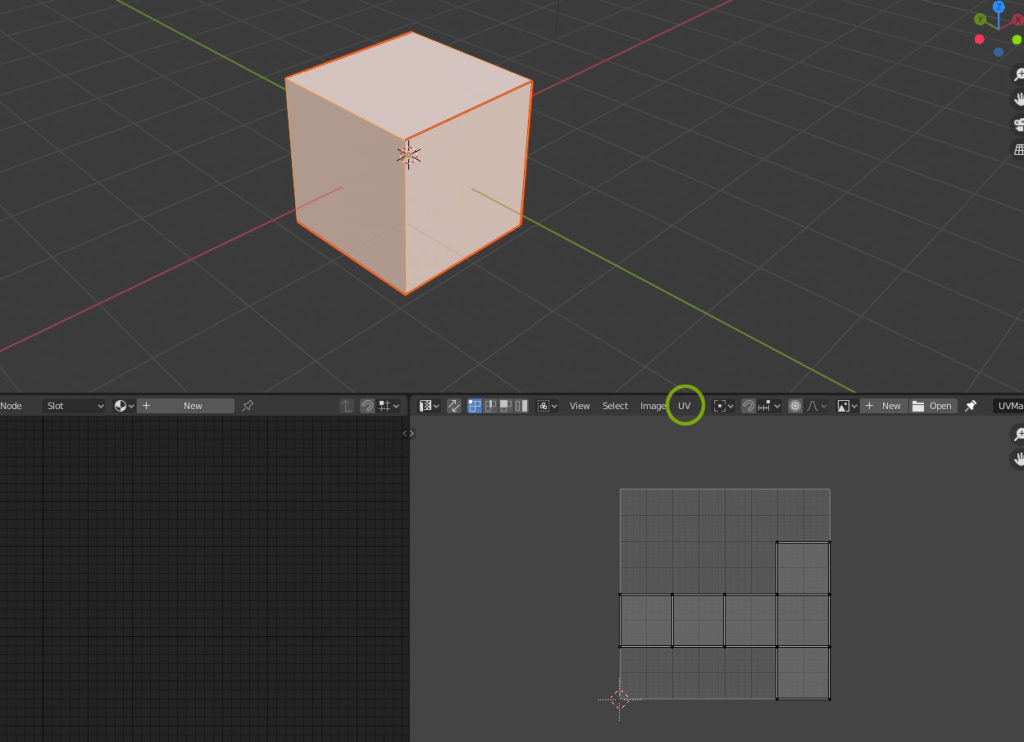
- UV unwrap the object
- In the Image Editor panel, click UV and select Export UV Layout. Name the file and save it.
- Open the UV export in your favorite image editor like GIMP or Photoshop
- Paint the texture onto the UV and save it
- In Blender, with the mesh selected, apply a new Material

- Open up the shader editor
- Shift+A to add a node and select Texture > Image Texture
- In the Image Texture node, click Open and navigate to the saved painted texture
- Connect the yellow Color output from the Image Texture node to the Base Color input on the Principled Shader node by clicking and dragging from one to the other
![]()
Adding an eye-catching material and texture to a 3D object is arguably the most important part of the 3D process. A well-made texture helps to sell the realism of an object in a photorealistic scene or helps to create a specific feeling or visual theme if the setting is more stylized.
Export and Paint the UV
To get started adding a texture, you first need to UV unwrap the mesh. In the Image Editor panel (it should be showing the UV of your mesh) click UV and select Export UV Layout.
From the file selector, choose where you would like to save the exported file and name it. In this window, there is also an option to change the file type as well as the size. The size is important to keep in mind based on the type of texture you will be creating. Higher resolutions work better for more realistic textures. Once the image is saved, open it up in your favorite image editor like GIMP or Photoshop. Painting textures could be a whole tutorial (or twelve) on its own, so we won’t go into detail on that here. Use the image editor to paint the new texture, using the UV layout as a guide. Below is a before/after example of the basic exported UV (left) compared to the finished painted texture (right).

Applying the Texture
Save the painted texture and return to Blender. With your mesh selected, click the Material Properties panel ![]() on the right and click the New button to add a new material. Open up the Shader Editor in one of your Blender panels.
on the right and click the New button to add a new material. Open up the Shader Editor in one of your Blender panels.

Learn more about how to manage Blender workspace panels and create your own UI layout.
In the Shader Editor, press Shift+A to add a node and select Texture > Image Texture from the popup. Click “Open” to add a texture, navigate to your painted texture file and open it. When you add a new material to an object, by default Blender uses a Principled BSDF shader node for the material. To add your texture to the Principled node, simply click the yellow output dot next to “Color” on the Image Texture node and drag it to the yellow input dot next to Base Color on the Principled node. To see the texture in the viewport, switch to Shaded or Rendered view mode:

Full setup:
