Updated for Blender Version: 3.1
Get to the Point
- Use Shift+A to add a curve.
- Tab into Edit mode and modify the curve as needed. This will act as the profile shape for the path.
- In Object Mode, use Shift+A again to add a curve path.
- While still in Object Mode, select the first curve and press Ctrl + A, and then from the “Apply” context menu, select “All Transforms”. Select the other curve and repeat the same process.
- Select the path, then click the Path Data Properties tab along the right.

- Open the Geometry dropdown tab, and find the Bevel sub-dropdown.
- Click the eye-dropper tool next to the Object field and select the curve you created in Step 2 (the curve that will act as your shape profile)
- With the shape projected along the crurve, you can now go into edit mode to modify the shape of that curve.
When modeling, there are times when it can be easier to use curves rather than the standard mesh modeling and extrusion. For example, when modeling stylized hair strands, it is easier to use curves as they are more easily manipulated and changed slightly than trying to do the same method with traditional geometry. Curves can also provide a much more organic look and feel to the model.
There are two parts to this method. There is a curve that acts as a sort of “profile” of the shape, and a path on which that profile is projected. For this example, start by adding a Bezier Circle by pressing Shift+A and then selecting Curves > Circle from the context menu. Then, press Shift+A again and select Curves > Path from the context menu. Just to make sure everything will work correctly, select the path in Object Mode, then press Ctrl+A to bring up the “Apply” context menu, and select “All Transforms” to apply all transformations. Select the circle curve and do the same.
While still in object mode, select the path and click on the Object Data Properties ![]() tab on the right. Find the Geometry dropdown tab and open it up. In that tab, you should see a sub-dropdown labeled “Bevel”. The Object field is what you’re looking for. Click the eyedropper tool and use it to click on the circle curve.
tab on the right. Find the Geometry dropdown tab and open it up. In that tab, you should see a sub-dropdown labeled “Bevel”. The Object field is what you’re looking for. Click the eyedropper tool and use it to click on the circle curve.

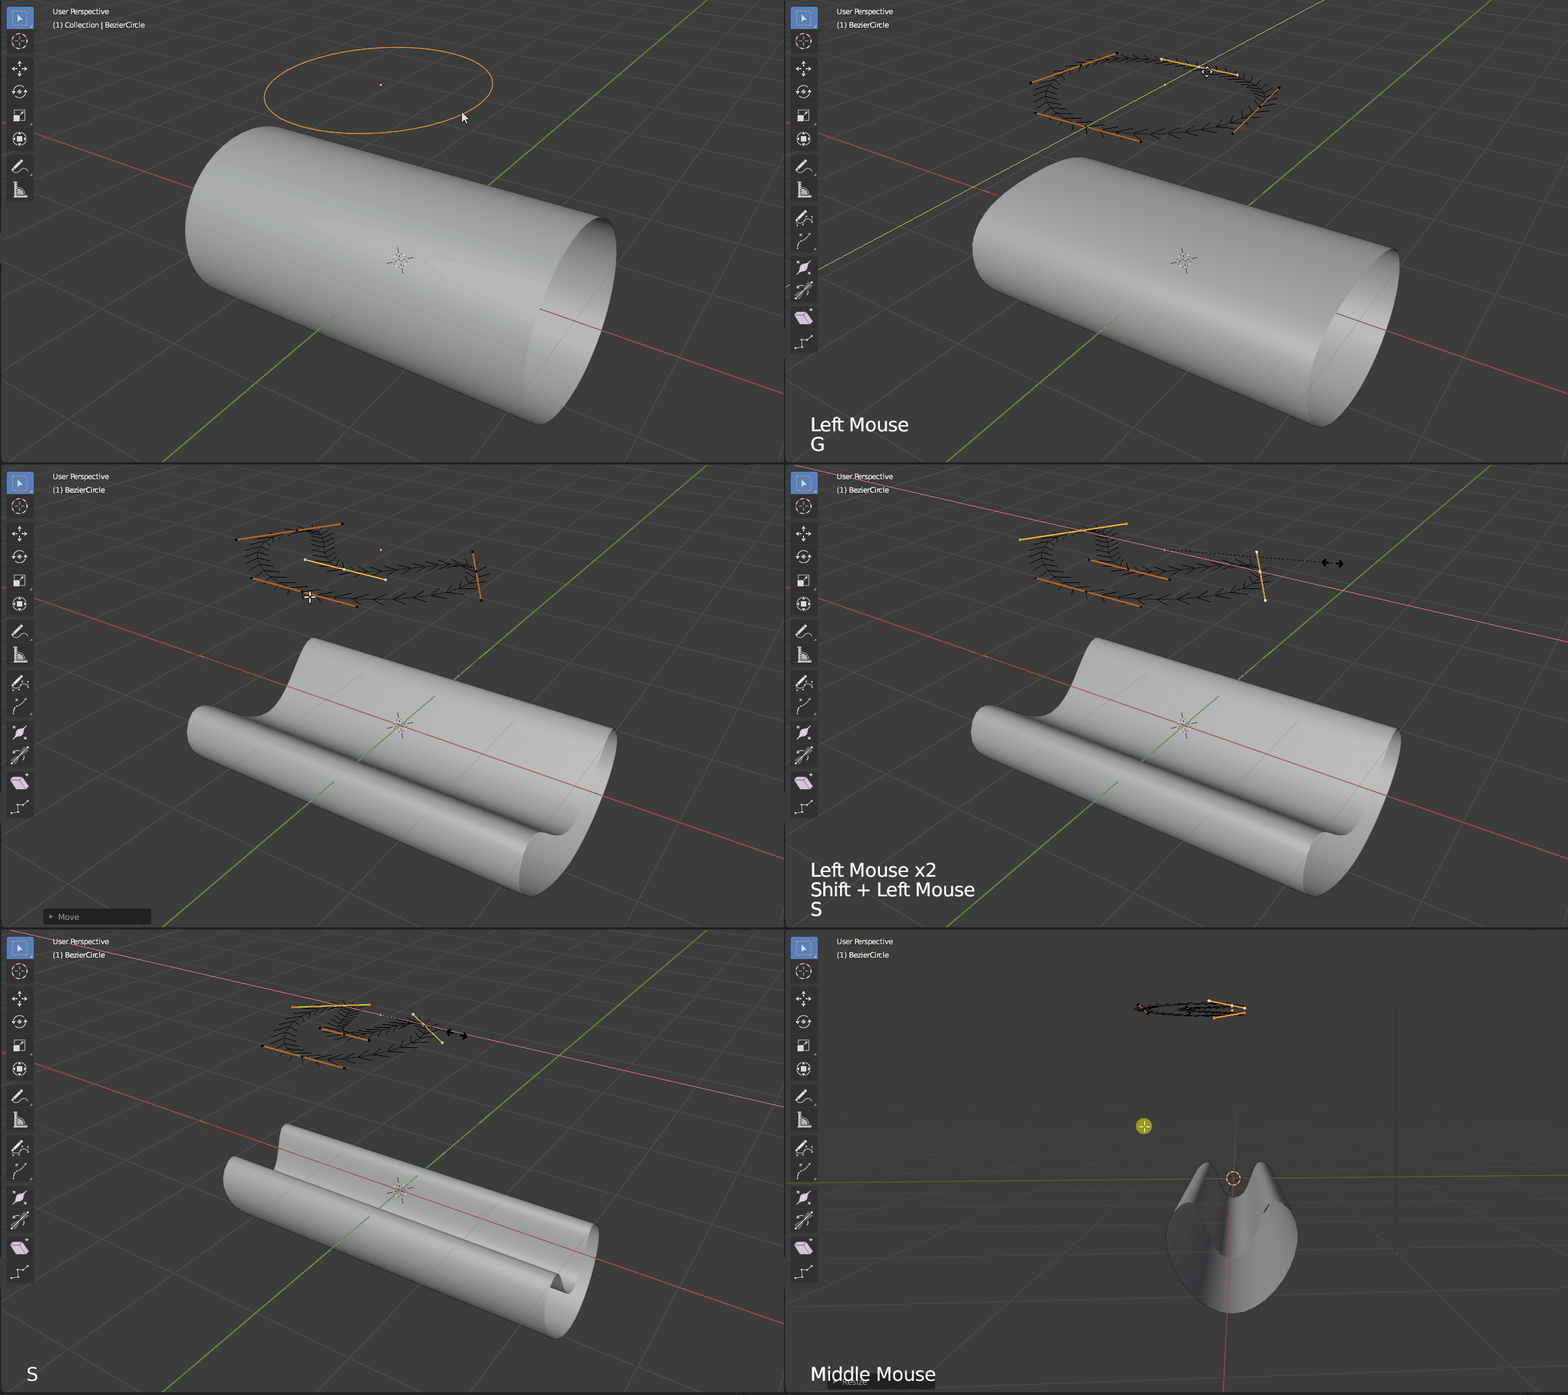
Your path should now look like a pipe. Use the “fill caps” checkbox to turn on or off the closing geometry at each end of the path. The beauty of this method is that the circle path (or whatever curve you created initially) remains editable and will affect the shape on the projected path. Select the circle curve. It should be inside the pipe now. Use G+Z to move the curve vertically so that it is visible. Tab into edit mode and begin modifying the control points of the circle. You will see that it affects the profile of your pipe shape.

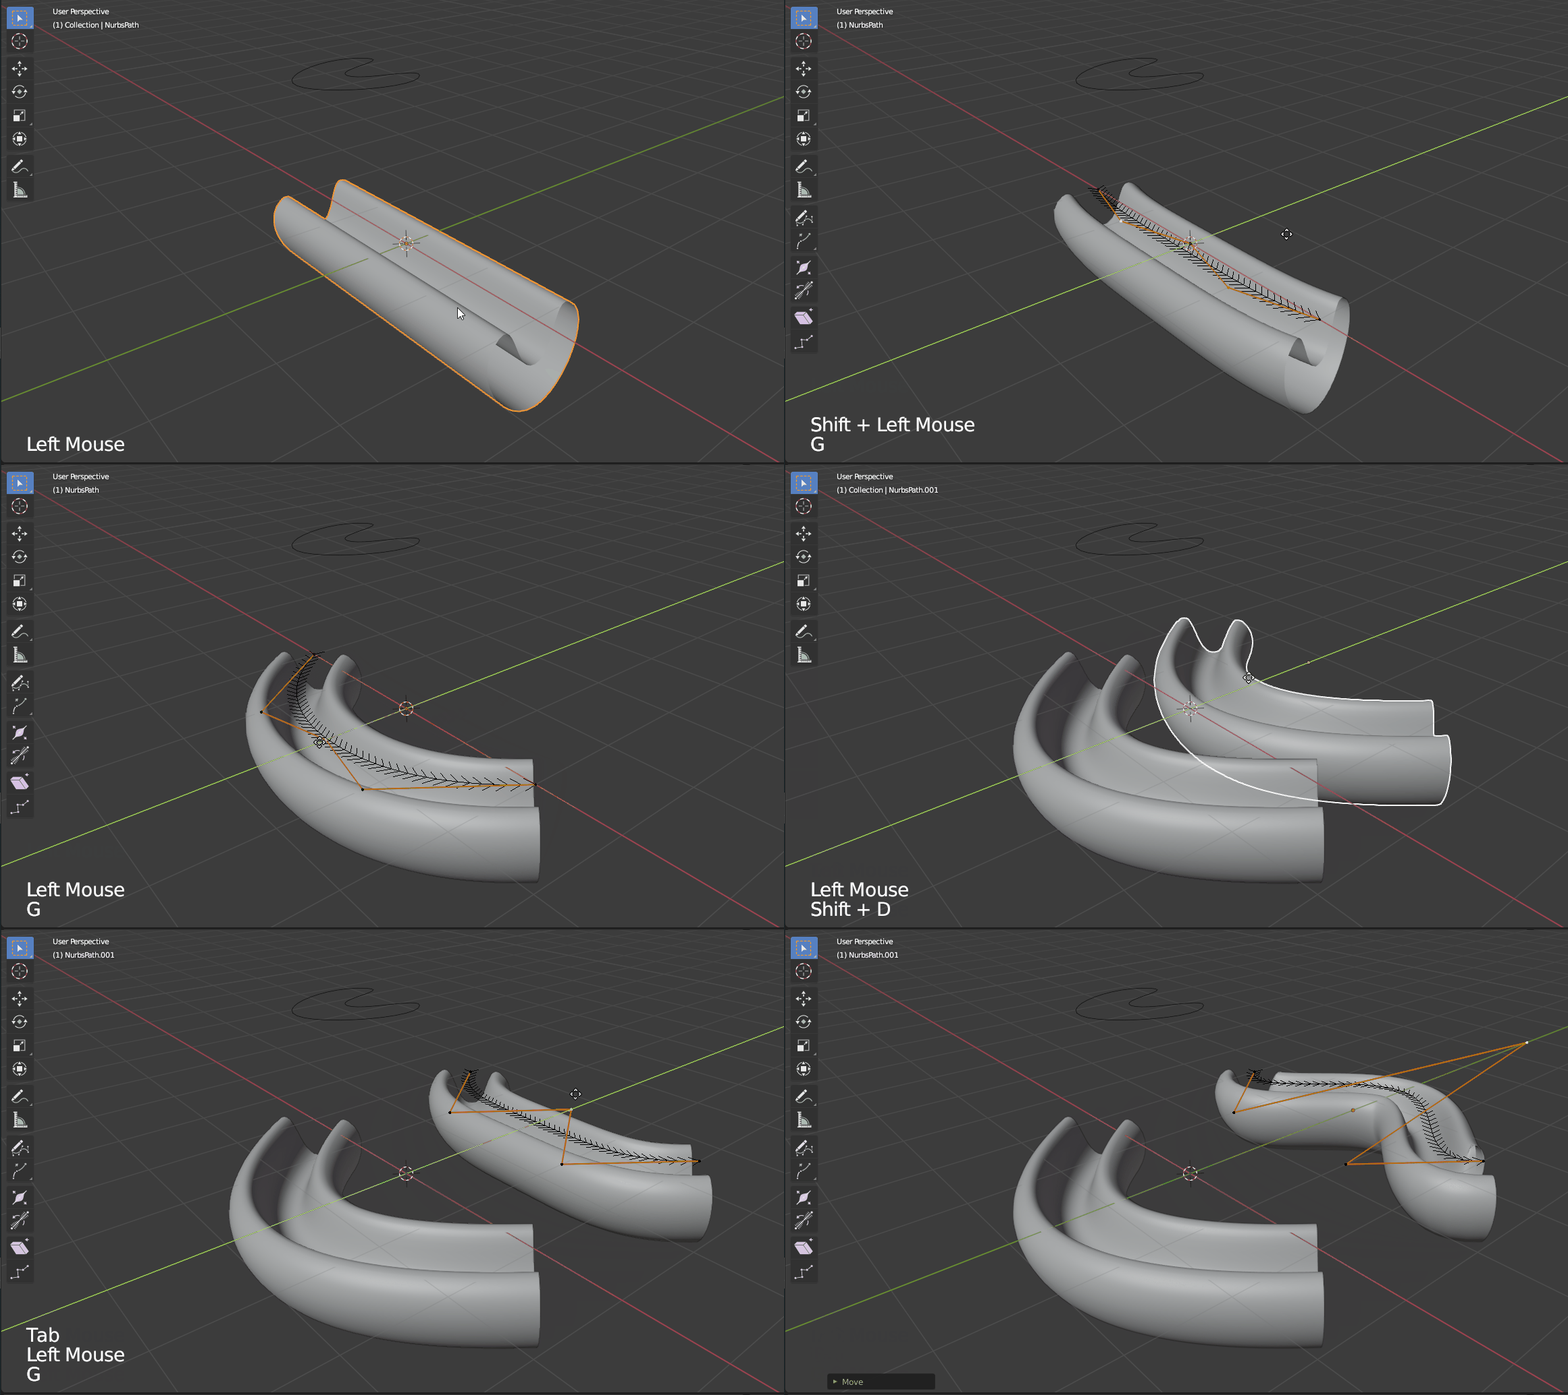
Additionally, by clicking the pipe in Object Mode and tabbing into Edit Mode, you can modify that curve as well to bend or twist the pipe. If you duplicate the pipe, the original circle curve still controls the profile, but each pipe path can be controlled individually. Also, in edit mode you can adjust the thickness of an individual vertex by selecting it and pressing Alt+S to scale.


