
Updated for Blender Version: 3.1
Whether it’s an early morning mist or a creepy nighttime haze, adding atmospheric fog can be a quick and easy way to add a little extra character to a scene.
Basic Fog Setup
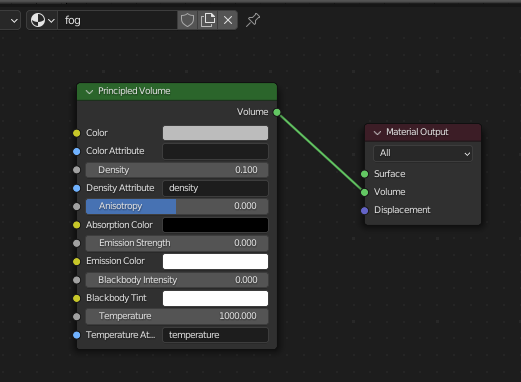
Start by opening up a scene. Here I’m using a small texturing project from Stylized Station’s “3D Coloring Book”, which uses some cool stylized gravestone models from Shaddy over on SketchFab. Any scene will do. Once your camera is positioned, press Shift+A, go to Mesh, and add a Cube. Use S to scale the cube so all the elements of your scene are inside it. Your cube is likely too tall on the Z axis, so make sure you scale the cube by using S+Z. In the Material Properties panel ![]() , add a new material to the cube. In the tabs along the top, go to Shading and delete the Principled BSDF shader in the Shader Editor. Press Shift+A to add a new Node, then go to Shader and click “Principled Volume”. Place it in the Shader Editor, then connect the “Volume” output socket to the “Volume” input socket in the Material Output node:
, add a new material to the cube. In the tabs along the top, go to Shading and delete the Principled BSDF shader in the Shader Editor. Press Shift+A to add a new Node, then go to Shader and click “Principled Volume”. Place it in the Shader Editor, then connect the “Volume” output socket to the “Volume” input socket in the Material Output node:
If you don’t see anything right away, you may need to drop the density to a low number. 0.1 worked well for me, though you may need to go lower.
Take a look at your rendered scene and you should now see some simple fog in your scene. This is the scene I am working with with fog, and without:

Setting the fog along the ground
That’s a nice effect and has its uses, but normally fog has some variation to it. Let’s start by setting the fog to appear closer to the ground.
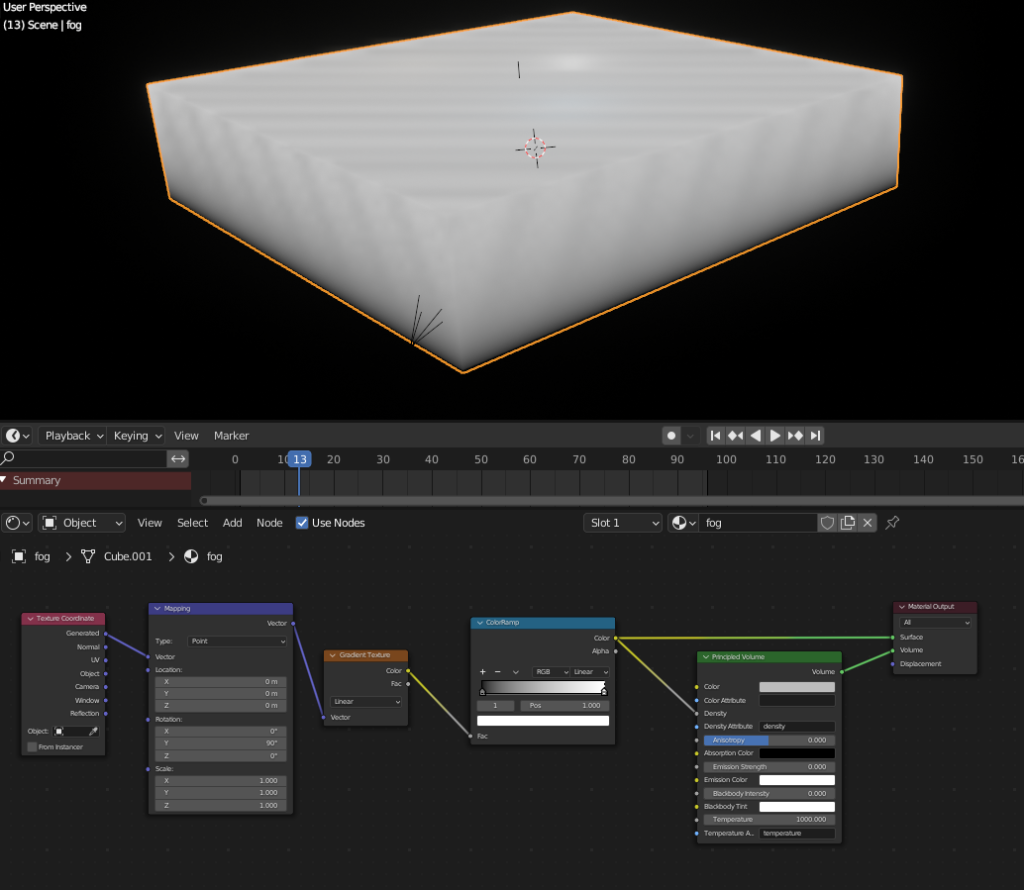
In the Shader Editor, press Shift+A > Texture and add a Gradient Texture. Connect the “Color” output to the “Density” input socket on the Principled Volume node. Once again, press Shift+A > Convert and add a ColorRamp node. Drop this node between the Gradient Texture and Principled Volume nodes. We’ll need to adjust the rotation of the gradient, so click on the Gradient Texture then press Shift+T (if you have Node Wrangler enabled) to automatically add and connect the Texture Coordinate and Mapping nodes.
It may be hard to see what the Gradient Texture is doing. You can connect the “Color” socket from the ColorRamp to the “Surface” socket on the Material Output node to see the gradient as a black and white texture on the outside of the cube. This can be helpful in rotating and placing the gradient, but don’t forget to remove it when you are done!
Since fog typically clings to the ground, we’ll need to rotate the texture. In the Mapping node, set the Y rotation to 90 degrees. It should look something like this:
We will be using this gradient as a sort of “mask” for the fog, so any white part of the gradient will show the fog, and any black part will hide it. This means we’ll need to flip this gradient and adjust it a bit. We can make these changes in the ColorRamp. Click the small downward arrow to the right of the + and – buttons. Click “Flip Color Ramp” and then drag the black color tab to the right, closer to the white color tab. This should drop the white part of the gradient to the lower part of the cube along the ground.
Add variation to the fog
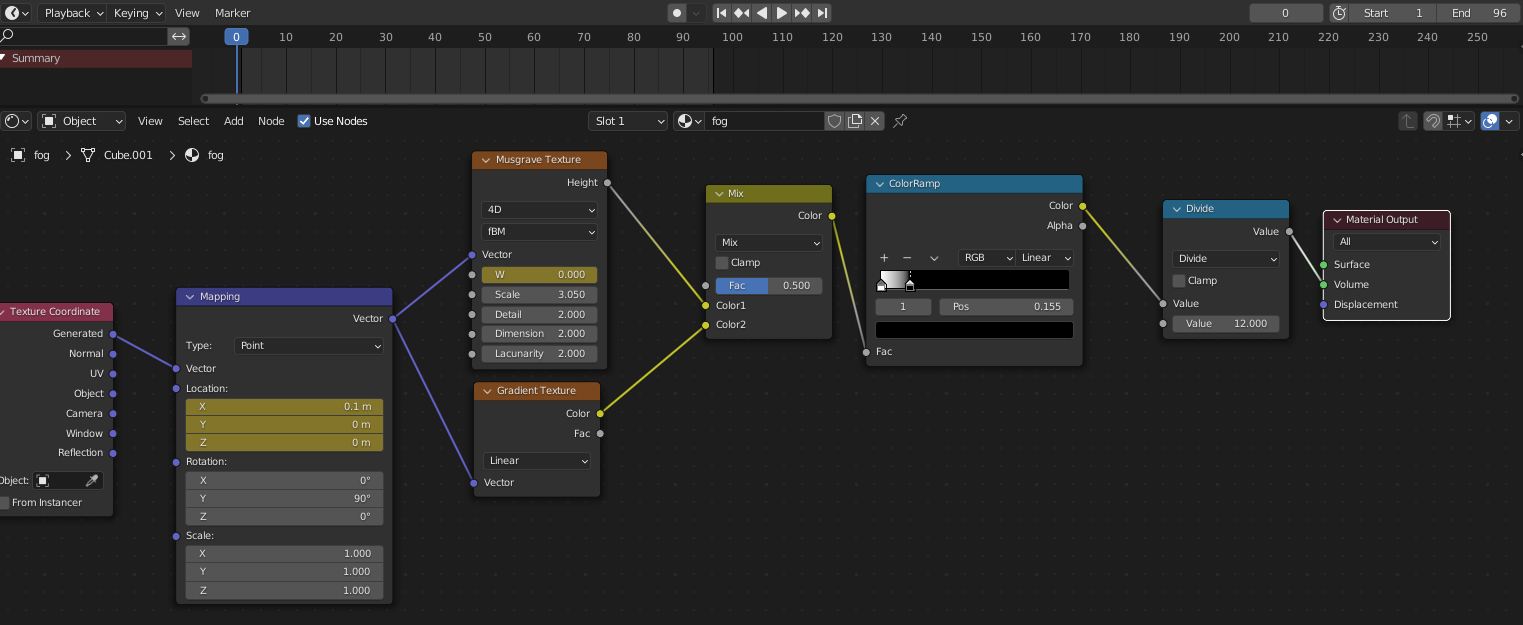
With the gradient in place, now let’s add some whispy waviness to it. Still in the Shader Editor, press Shift+A > Texture, and add a Musgrave Texture. Place it right above the existing Gradient texture. Connect the Mapping “Vector” output node to the “Vector” input node on the Musgrave Texture so both the Musgrave and Gradient textures are using the same location/rotation/scale. Press Shift+A > Color, and add a MixRGB node. Place it between the Gradient Texture and the ColorRamp. Connect the Musgrave “Height” output socket to the the top “Color1” input socket, and the Gradient “Color” output to the “Color2” input.
If the fog now looks too thick again, press Shift+A > Convert, and add a Math node. Place it between the ColorRamp and Material Output, set it to Divide and adjust the number as needed. A higher number will help thin out the fog.
Adjust the Scale setting in the Musgrave texture as needed, as well as the Location settings in the Mapping node (to raise and lower the fog if needed). Here is my final node setup:
What about some animation?
At this point, the fog is now very easy to animate. We’ll need a Timeline window pulled up. You can see how I added the Timeline panel above the Shader Editor in the image above. At the beginning of the timeline, on the Mapping node, hover over the Y setting under Location and press I. This will set a keyframe there. Now drag the timeline slider to the end of the timeline and then change that Y value to something higher. Since it is fog, we don’t want it to move too fast, so keep the number low. When it’s set, press I again to set the last keyframe. Play the animation and see your fog drift across your scene.
There is one final piece we can animate. In the Musgrave texture, make sure it is set to “4D”, which will give you the “W” setting. Following the same steps as above for the Y Location, we will add a start and end keyframe for the W setting. At the start of the timeline, hover over the W setting and press I. Go to the end of the timeline, change W to 1, then press I to set the keyframe. That’s it. That W setting should now give your drifting fog a billowing, changing pattern as it drifts across the scene:
