Updated for Blender Version: 4.1.1
Get to the Point
- Mark Seams on the object with ctrl+E > Mark Seams
- Apply a material
- In Edit Mode, press A to Select All, then U > Unwrap to do an initial unwrap
- The unwrap probably doesn’t look great. In Edit Mode > Face select, choose one of the faces. Press U to unwrap that one face.
- Grab the vertices of the uneven rectangle and even them out in the UV Editor
- With that face still selected, press A to reselect all other faces as well.
- Press U > Follow Active Quads and press OK.
- In the UV Editor, select all, then click UV > Pack Islands
If you have ever done any amount of UV unwrapping, you will inevitably come across objects that just don’t seem to unwrap cleanly. Round objects like a cylinder or torus can easily cause you trouble. Blender has a built-in tool that helps to make unwrapping these pesky objects a little bit easier.
Prep the Object
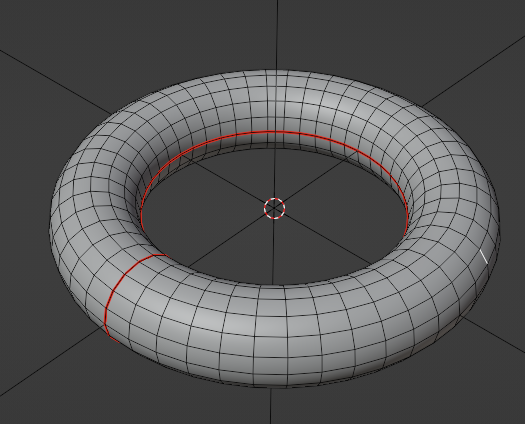
As with any object that needs to be unwrapped, start by clicking the object and going into Edit Mode. In this example, we’re going to use a simple Torus. Use the Edge Select tool along with ctrl+E > Mark Seams to set some seams on your object. Check out this tutorial for more info about unwrapping an object. Don’t forget to apply a material to the object before unwrapping it. Once the seams are marked, press A to select all parts of the mesh and then press U > Unwrap.
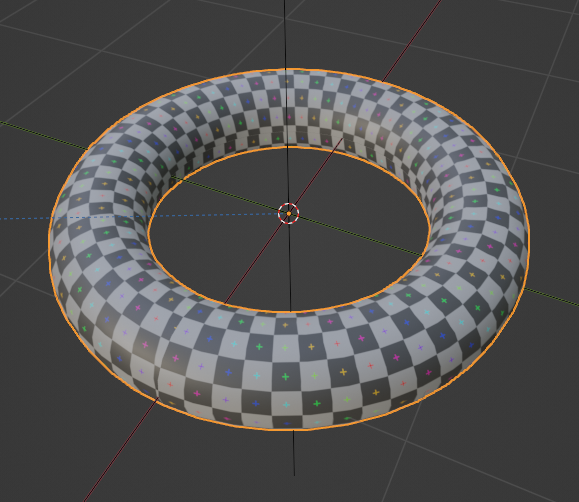
If you are dealing with a round shape, it will likely be an ugly unwrap. It might look something like this:
Unwrap a Single Face
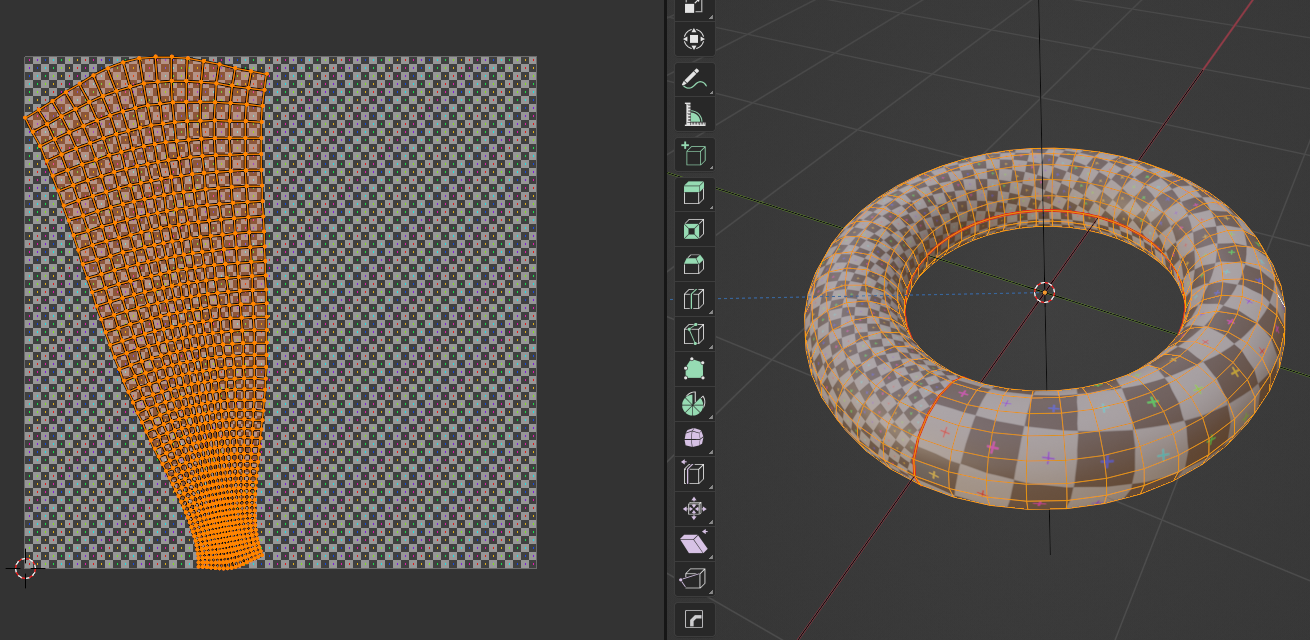
Let’s clean up these UVs and make the map a little more uniform. In Edit Mode, using face select, select any one of the faces on the object. Once again, press U > Unwrap to unwrap that single face. That single face might look something like this:
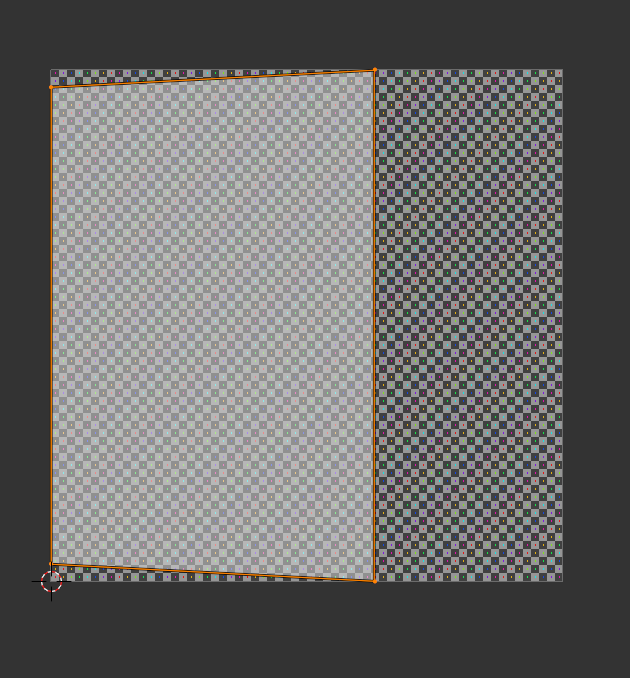
In the UV Editor panel, we need to even up this rectangle first. Let’s highlight the top two vertices, press S + Y + 0 to scale the vertices along the Y (up and down) to zero. That will make the top edge perfectly flat. Do the same for the bottom two vertices. Now we should have a perfectly even rectangle.
Unwrap the Whole Object
Back in the 3D viewport with that single face still selected, press A to select the rest of the faces on the object. The original face should still have a white outline, signifying that it is the active face. Once again, press U to bring up the Unwrap menu, but this time press “Follow Active Quads” and then press OK. In the UV Editor, you should see a much more even unwrap of the object, though it will probably be way too big for the UV area. In the UV Editor, press A to select all unwrapped vertices, then click “UV” at the top of the panel and select “Pack Islands” to scale the unwrapped geometry to perfectly fit in the UV area.
After all that, you should have a much cleaner unwrap for your round object.