Updated for Blender Version: 4.1.1
Get to the Point
- Select the object with a material applied.
- Open up the Shader Editor.
- Press Shift+A, then hover over Input and select “Texture Coordinate”.
- Press Shift+A again, then hover over Vector and select “Mapping”.
- Connect the relevant “Texture Coordinate” output (usually “Generated” or “UV”) to the top “Vector” input on the “Mapping” node.
- Connect the Vector output from the mapping node to whatever texture node you are using.
- Adjust “Mapping” settings as needed.
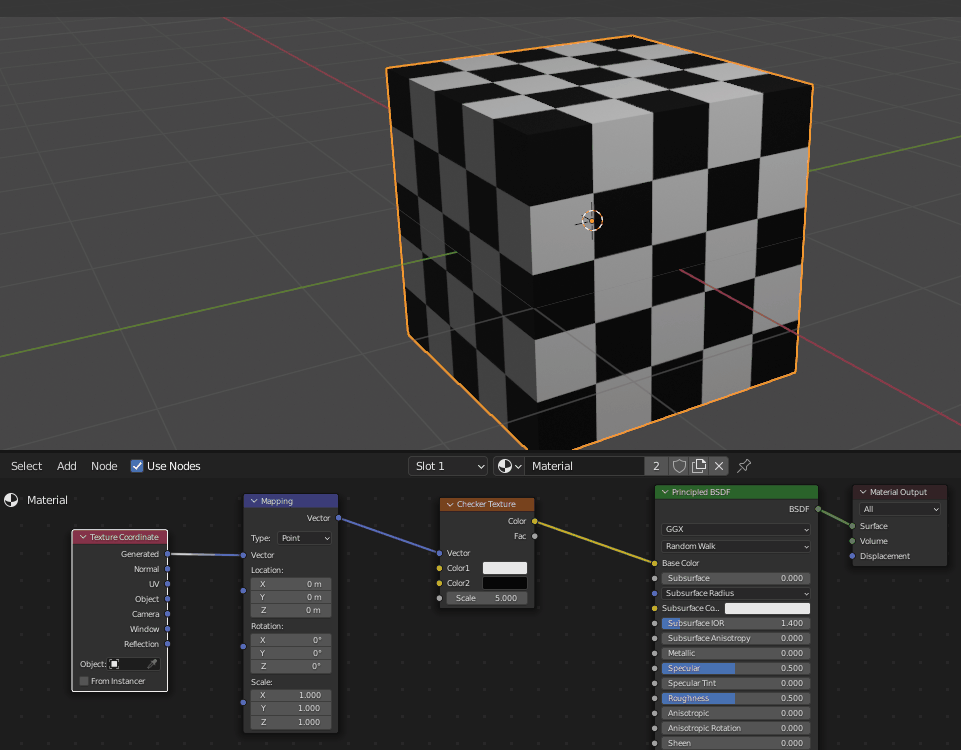
When using repeatable image textures, sometimes it is necessary to adjust the position, rotation, or scale of the texture. This is simple to do with a combination of the Texture Coordinate node and the Mapping node.
Transform the Location, Rotation, and Scale of the Image Texture
Start by selecting the object with the image texture applied. If there is no image applied yet, follow these steps to add a new image texture. With the object selected, navigate to the Shader Editor.

You should see the Principled BSDF shader node, a material node, and an Image Texture if you have already added one. Press Shift+A to add a new node, hover over Input and select Texture Coordinate. Move this node to the left of your workspace and press Shift+A again. This time, hover over Vector and select Mapping. Move this node to the right of your Texture Coordinate node.
Connect the output from the Texture Coordinate node (usually the “Generated” or “UV” outputs will work) to the Vector input on the Mapping node. Connect the Mapping vector output to the vector input of your texture node. This will now allow you to change the location, rotation, and scale of your texture by using the settings in the mapping node.